Here's another cute felt flower DIY. This one is super easy, just about anybody can do this. Enjoy!
Steps:
1. Cut out strips of felt 1" width and 12" length (depending on how big you want your flower to be).

2. On one side of the strip, cut out slits all the way till the end.
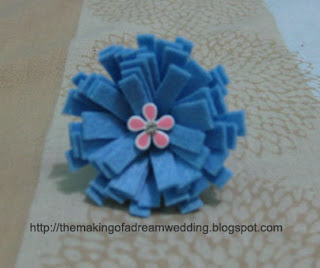
3. Roll the strip to form the flower. Put some hot glue every once in a while.
4. Form your flower as you want it. Put a stud in middle if you like =D You're done!
You can also make loopy mums with the same step. Just have the strips in 2" width. Fold the strip in half and glue one side of the strip before cutting the slits. These looks really nice too.

I hope you enjoyed making these flowers as much as I did. Next stop on my DIY series is how to make rosettes. =D
Materials Needed:
Felt Cloth
Scissors
Ruler and Pencil for measuring and marking
Glue Gun
Earrings or Studs (optional)
Steps:
1. Cut out strips of felt 1" width and 12" length (depending on how big you want your flower to be).

2. On one side of the strip, cut out slits all the way till the end.
3. Roll the strip to form the flower. Put some hot glue every once in a while.
4. Form your flower as you want it. Put a stud in middle if you like =D You're done!

You can also make loopy mums with the same step. Just have the strips in 2" width. Fold the strip in half and glue one side of the strip before cutting the slits. These looks really nice too.

I hope you enjoyed making these flowers as much as I did. Next stop on my DIY series is how to make rosettes. =D


